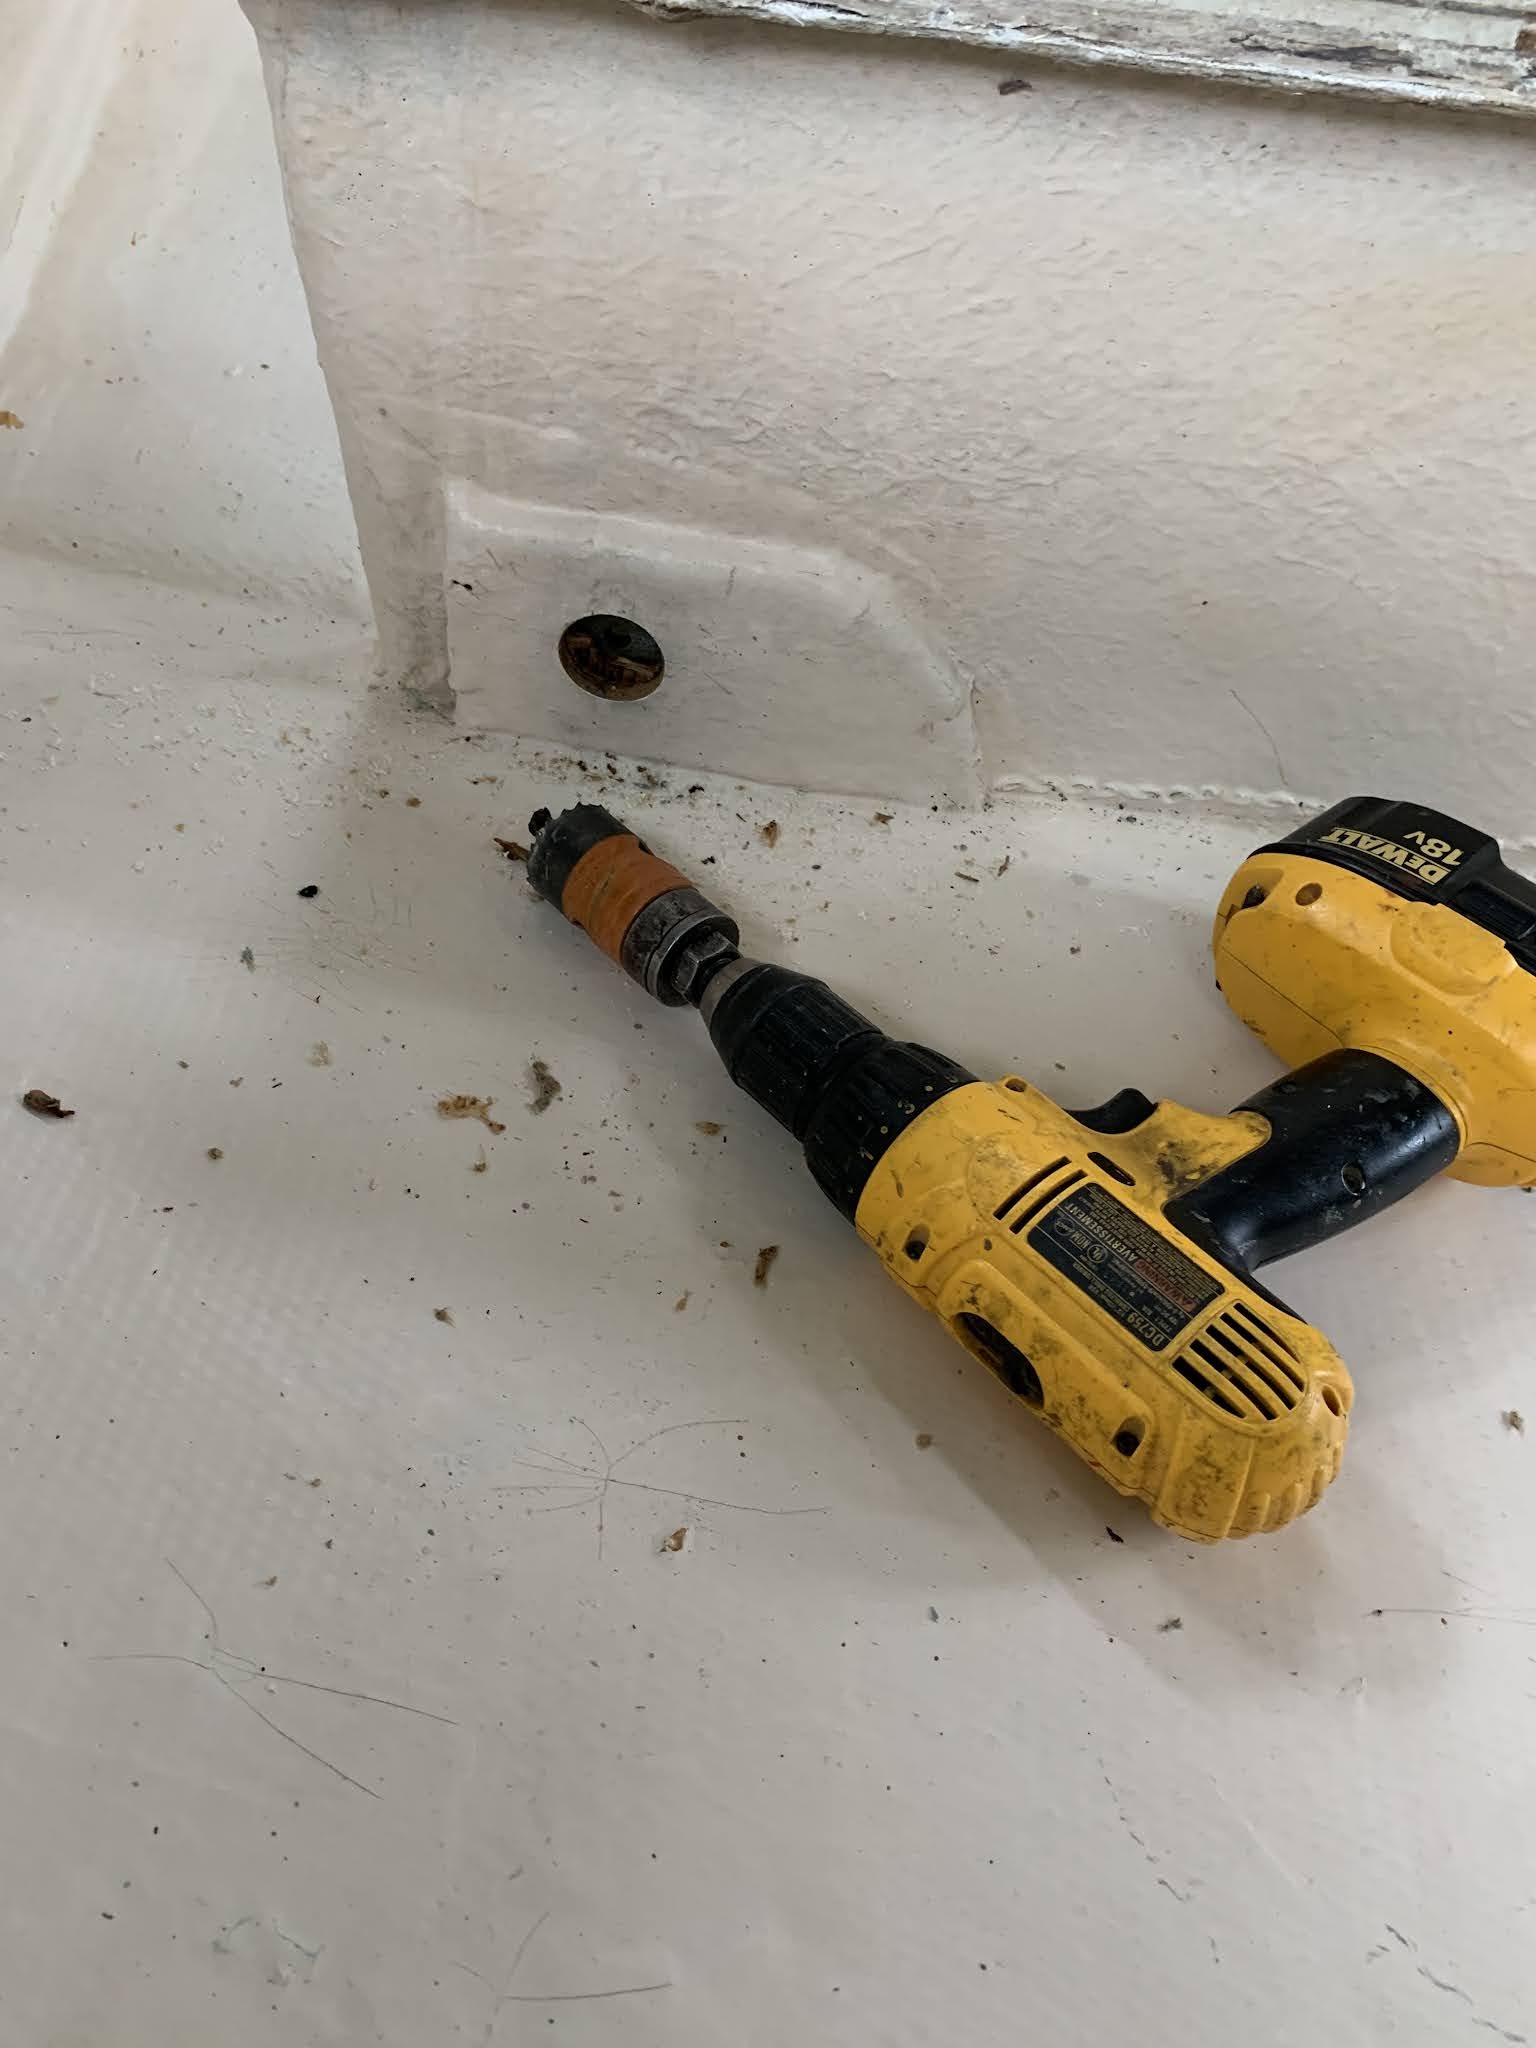
This area appeared to be sound, but after the rot I encountered elsewhere, I thought I’d investigate a bit. I used a holesaw to biopsy the core, thinking I'd replace the disc by epoxying in a stack of fiberglass discs to form a waterproof bushing. The plywood proved to be soaking wet though not rotten. I decided that given the certainty of future water ingress, I'd rebuild this area.
.
The glass sliced for removal.

The piece gently pried off.

All residual glass, filler etc ground off.

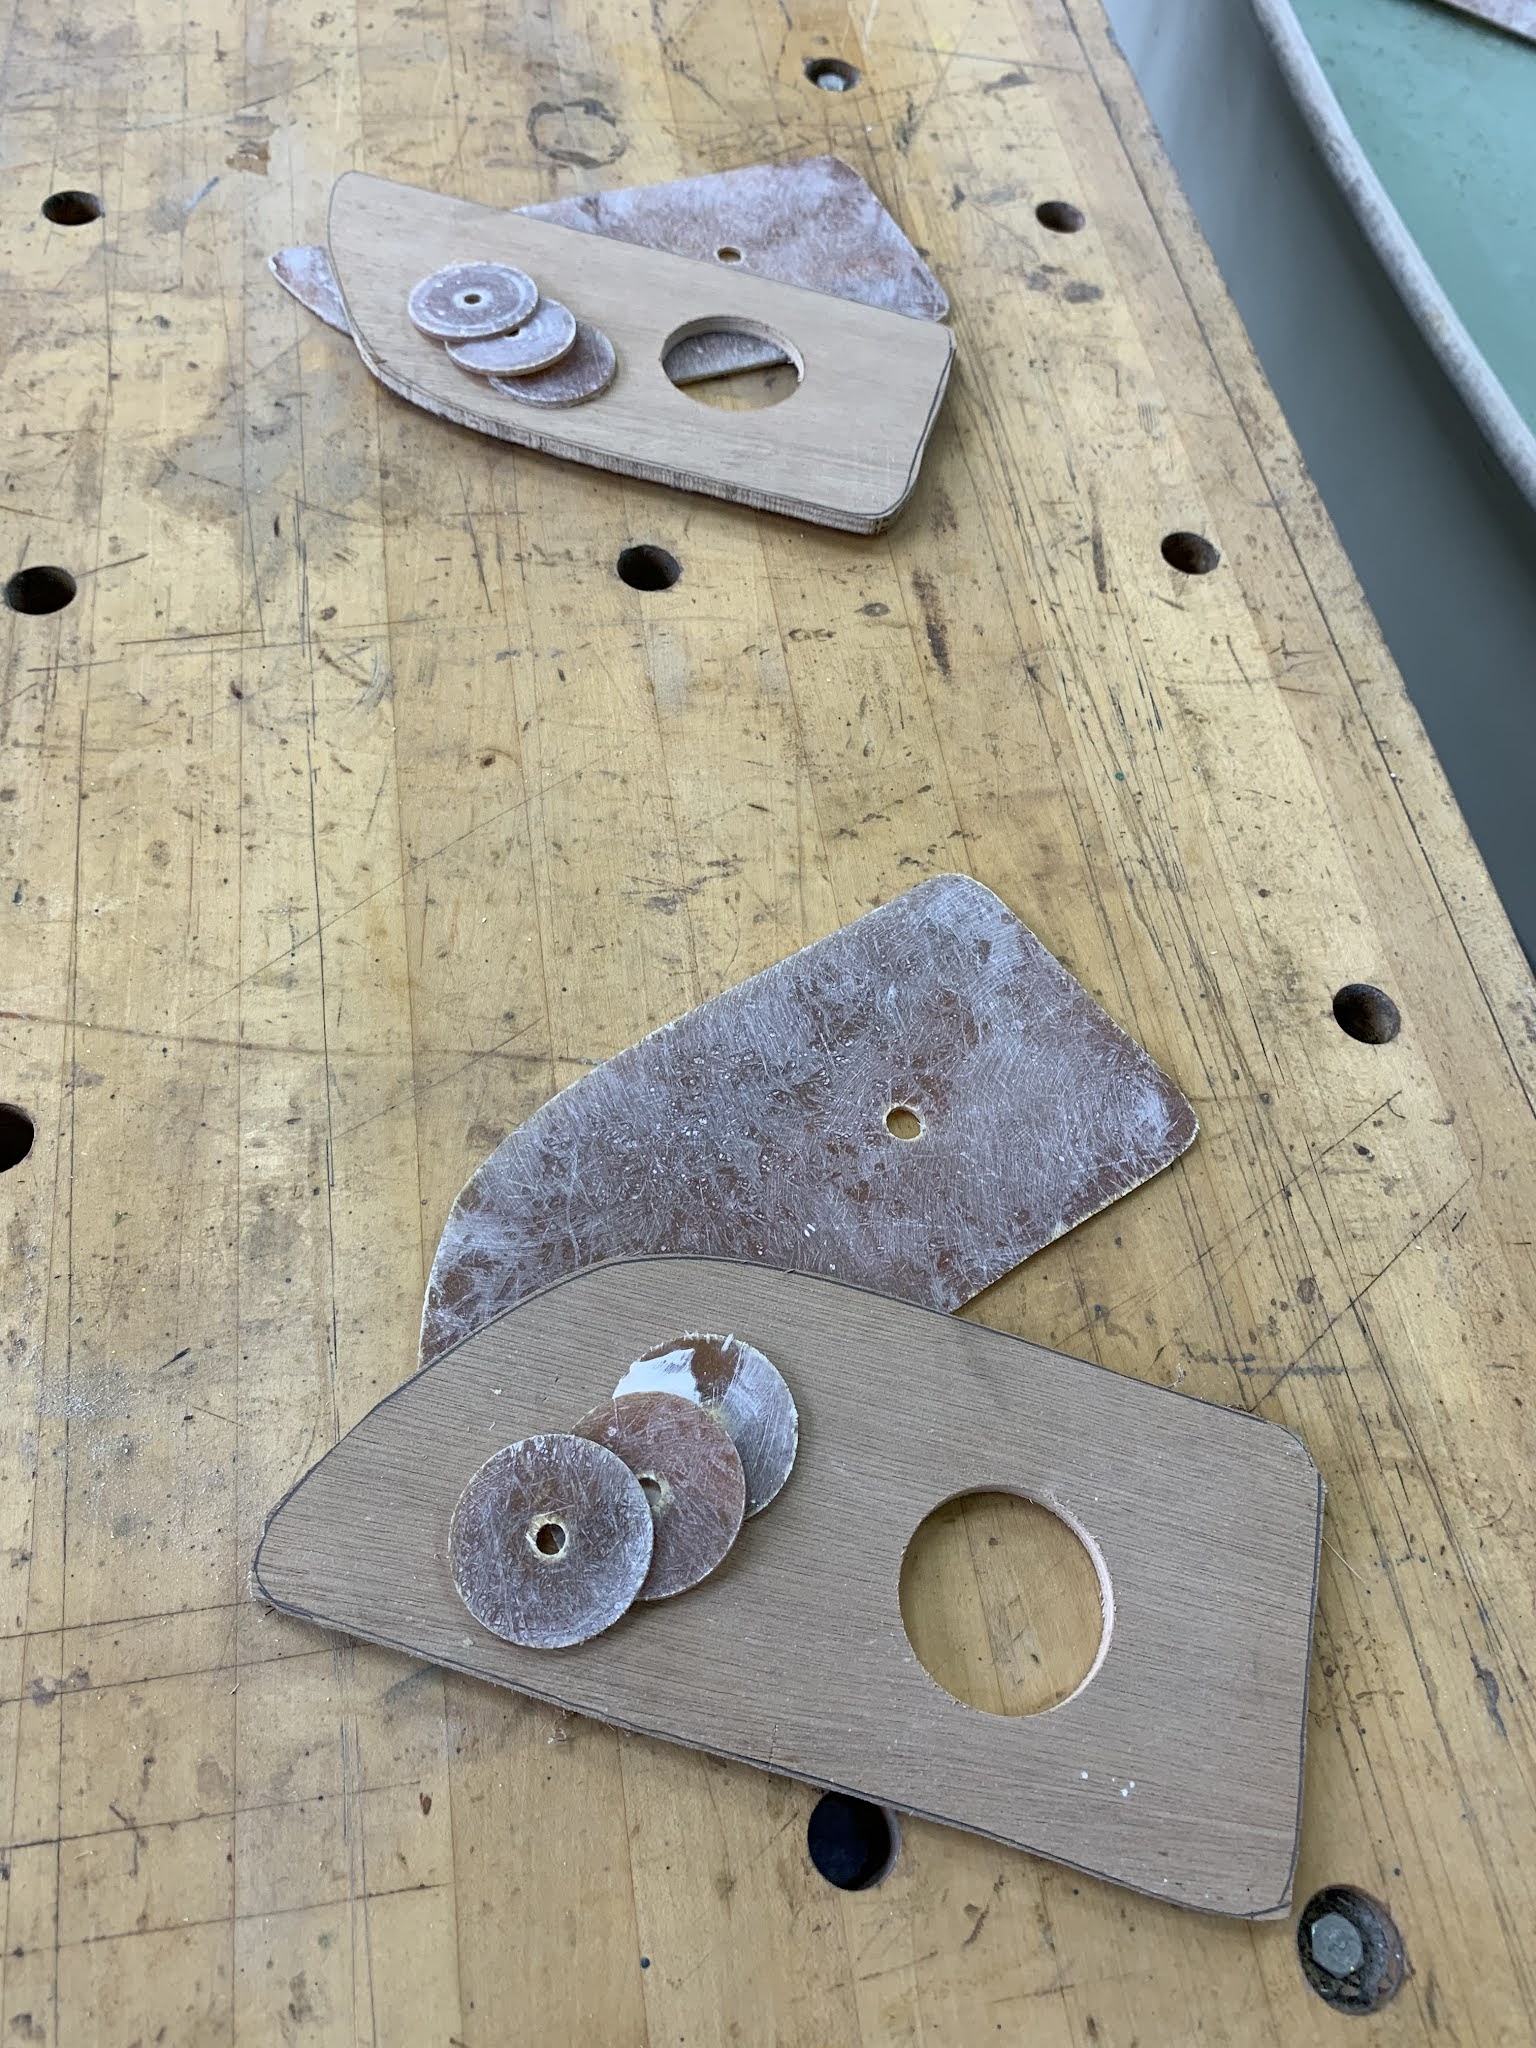
The sheet fiberglass pieces below were cut from the scrap inner transom panel that was removed. Waste not want not!

The pieces ready. The fiberglass plate will be epoxied to 1/4" marine plywood which has already been bored for a stack of fiberglass discs. (also cut from the scrap.) The discs will form a solid fiberglass bearing for the centreboard bolt, and the assembly will be epoxied then glassed to the side of the trunk, and to the hull. this arrangement will prevent water from entering the core.
Mise en place.

A sheet of waxed paper was stapled over a board, the glass plate placed on that, the plywood epoxied to it, then the 3 discs stacked in the hole, with more epoxy forced into any remaining gaps.

Then those discs were also clamped to ensure a solid glass-reinforced block for the pivot bolt.


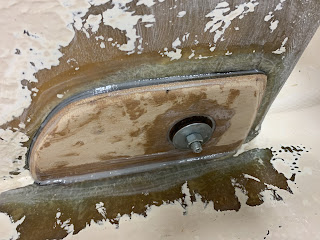
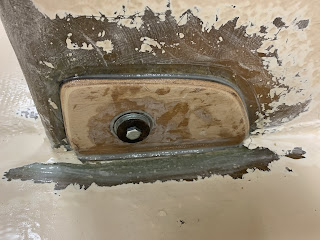
And the bolt was removed - a snug fit! The edges where then faired into the trunk with more thickened epoxy, and a saturated layer of 1208 stitch mat laminated over top. This was shaped to match the reinforcement, with overlap of around 2" around the perimeter. It conformed easily, better than I had expected.
This will outlast Keith Richards!
At this point, I'm remembering why my friend Mark calls me "a sucker for a lost cause".
Next is making a flat sheet of fiberglass to bond to the flange on top of the trunk. If necessary, this flange will then be further reinforced from beneath, and a starboard cap bolted on top. No wood to maintain. The original was plywood, pop riveted in place....

The layup on a piece of waxed paper, atop a sheet of plate glass. Two layers each mat and cloth.

After cure...


And cut again. These pieces will be glued together to double the thickness. The part will form a very flat reinforcement for the top flange of the centreboard trunk, with the HDPE (starboard) cap bolted through that.


Trimmed and prepped, and epoxied in place.

Slot cut out. I’ll need to mock up the centreboard to determine how far aft to cut the slot. The trunk is now noticeably stiffer than it was.

The starboard cap will have soft radiused edges and will be screwed through the flange just installed.
Making the cap
StarBoard centreboard trunk cap, Cut approximately to shape. This was ripped on the table saw, a hole bored with a forstner bit, then the inner cuts done very carefully on the bandsaw. Any saw marks were filed flat. Easy material to work!


Comments
Post a Comment